

Introduction
So you have a beautiful piece of artwork you want to embroider on your Husqvarna Viking machine. You have the design ready, your machine is threaded, and you are excited to get started. But then you hit a wall. Your machine does not read JPGs or PNGs. It needs a specific file format to understand where to put every single stitch. That is where the magic of Convert artwork to VP3 embroidery format comes in. If you are using a Husqvarna Viking or Pfaff machine, VP3 is one of the most important file formats you will ever work with. It is the language your machine speaks fluently. In this guide, we will walk through what VP3 actually is, how it differs from other formats, and the best ways to get your artwork into this stitch-ready format. No confusing jargon, just practical advice from someone who has been there.
What Exactly Is a VP3 File?
Let us start with the basics. VP3 is a proprietary embroidery file format developed by Husqvarna Viking and Pfaff . It is the go-to format for these machines and is designed to store detailed embroidery designs. Unlike some other formats that are just simple dumps of machine commands, VP3 has a more sophisticated structure. Think of it as a digital blueprint for your embroidery .
VP3 files are vector-based. What does that mean for you? It means they scale beautifully without losing quality . If you need to resize a design, a VP3 file will handle it much better than a pixel-based format. The file format is also packed with information. It does not just tell the needle where to go. It holds thread colors, stitch types, and detailed instructions for each section of the design .
The format is built like a set of nested Russian dolls. It contains tags like 020 for embroidery summary, 030 for hoop details, 050 for thread information, and 010 for the actual stitch data . This structure allows the file to hold multiple designs or split a large design across several hoops, although most files you will encounter contain just a single design . Understanding this gives you a glimpse into why VP3 files can produce such precise and reliable stitches.
VP3 vs. Other Formats: What Makes It Special?
You might be wondering why you would choose VP3 over something like PES or DST. The answer comes down to what you are stitching and what machine you are using.
PES is the main format for Brother and Babylock machines. DST is the industry standard for commercial machines and is known for its wide compatibility . But for Husqvarna Viking and Pfaff users, VP3 is often the preferred choice.
One of the standout features of VP3 is how it handles colors and complex design data . Unlike some formats that are stripped down, VP3 retains the rich details of your design. It also supports what some call “Grade A” design information, meaning it stores enough data for perfect scaling and transformation .
There is also a newer format called VP4, which is the preferred export format for mySewnet software because it preserves the separate parts of multipart designs . So if you are working with complex projects, VP3 (and VP4) are the formats that will serve you best.
How Do You Actually Convert Artwork to VP3?
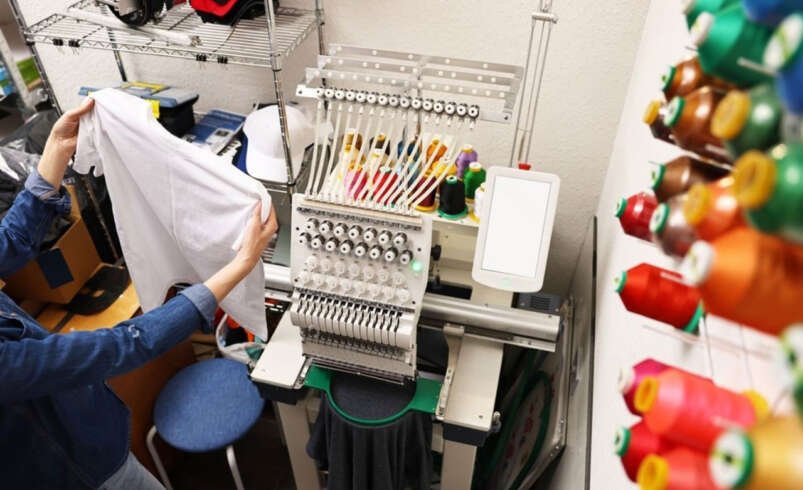
Now for the practical part. How do you actually turn your logo or image into a VP3 file? The process is called digitizing, and it requires specific software.
Option 1: Husqvarna Viking’s Own Software
The most straightforward path is to use Husqvarna Viking’s own solutions. Programs like Premier+ 2 and mySewnet are designed specifically for these machines . They offer built-in tools for editing, stitch simulation, and direct connectivity to your machine.
In Premier+ 2, you can import your image, and the software will analyze it and suggest thread colors. You can then adjust the design, remove unwanted colors, and see a preview of how it will stitch out. Once you are happy, you hit “Send To mySewnet” and the file is transferred as a VP3 . This is the most seamless experience for Husqvarna Viking users.
Option 2: Professional Digitizing Software
For those who want more control, industry-standard software like Wilcom Embroidery Studio, Hatch, or Pulse are excellent choices . These tools are used by professional digitizers because they offer advanced features like custom stitch effects, density adjustments, and precise control over underlay . However, they come with a steeper learning curve and a higher price tag.
Option 3: Free and Low-Cost Tools
If you are just starting out or only need to convert a few simple designs, free options like Ink/Stitch (an open-source extension for Inkscape) or SewArt can be useful . They provide basic digitizing capabilities and are great for experimentation. Just keep in mind that they offer less control and reliability for complex logos.
Auto-Digitizing vs. Manual Digitizing
This is where the real quality difference comes in. Most digitizing software offers auto-digitizing. You click a button, and the software uses an algorithm to convert your image into stitches. It is fast and can work for simple designs, but it often produces inconsistent results, especially with text or detailed logos . The software lacks the human judgment needed to optimize stitch directions and densities for different fabrics.
Manual digitizing is the gold standard. This is where an experienced human manually traces the design and assigns every stitch type, angle, and density . It takes more time and skill, but it is the only way to ensure a logo looks sharp, sews flawlessly, and does not pucker or break thread . If you are running a business or working on a high-value project, manual digitizing is worth the investment.
Key Settings for Perfect Stitching
When you convert artwork to VP3, a few settings make all the difference. Understanding these will help you get better results, whether you are doing it yourself or working with a digitizer.
Stitch Types. Different parts of your design need different stitches. Satin stitches are great for letters and borders because they are smooth and dense . Fill stitches are used for larger areas, and running stitches work best for fine details and outlines.
Density and Underlay. Density controls how tightly the stitches are placed. If it is too dense, the fabric puckers. If it is too light, the fabric shows through. Underlay stitches are the foundation layer that stabilizes the fabric and prevents the top stitches from sinking in . A good digitizer balances all these factors.
Pull Compensation. This is a fancy term for adjusting for fabric stretch. When the machine sews, the fabric pulls and shifts. Pull compensation corrects for this by slightly adjusting the stitch placement, so the design keeps its shape .
Testing Your VP3 File
Never, ever skip this step. Before you stitch your design on that expensive jacket or bag, run a test stitch on a piece of scrap fabric that is similar to your final material . This is your safety net. Watch the machine as it stitches. Look for puckering, thread breaks, or any distortion. If something is off, you can go back to the software, adjust the settings, and try again . It is a small step that saves a ton of frustration and wasted materials later.
When to Call in the Pros
Here is the honest truth. While it is absolutely possible to digitize your own artwork, there is a reason professional digitizing services exist. Professional digitizers use high-end software and have years of experience. They know how to optimize files for specific fabrics and machines. They handle the complex details of pull compensation, underlay, and density so you do not have to .
If you are a business owner, the time you save by outsourcing digitizing is often more valuable than the cost of the service. A professional service will also provide free revisions and test stitches, giving you peace of mind that your file will stitch out perfectly on your Husqvarna Viking machine . They can take your JPG, PNG, or vector logo and deliver a flawless VP3 file in just a few hours.
Conclusion
Converting your artwork to a VP3 embroidery file is the key to unlocking the full potential of your Husqvarna Viking or Pfaff machine. VP3 is more than just a file format. It is a rich, vector-based blueprint that tells your machine exactly how to create your design with precision.
Whether you choose to use Husqvarna’s own software, invest in professional digitizing tools, or hire an expert, the goal is the same. You want a file that stitches out flawlessly, every single time. Remember to test your files, pay attention to stitch settings, and do not be afraid to call in the pros for complex projects. With the right approach, you can turn any artwork into a stunning embroidery piece that looks exactly as you imagined.